Ganache Server Settings

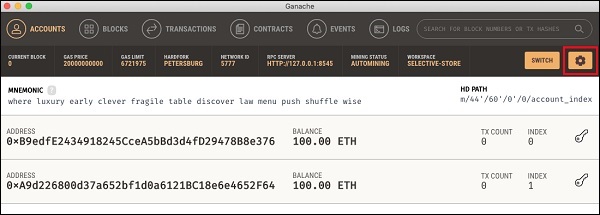
Click on the settings icon at the top right hand side of the screen as shown in the screenshot below −

Ganache Settings

The server settings screen will appear as shown below −

Server Settings

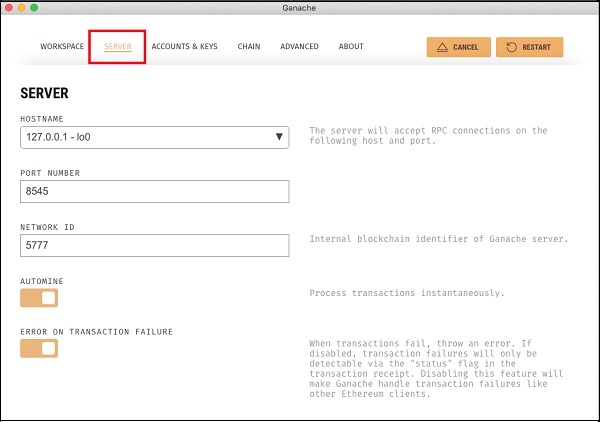
Here, you will be able to set the values of server address and the port number for your Ganache server. For the time being, leave these to their default values. The Network ID is an internal Blockchain identifier of Ganache server; leave this to its default value. The Automine button is in the ON state indicating that the transactions would be processed instantly. If you switched this off, it will ask you to enter the time in seconds after which the blocks would be mined.

Account and Keys

When you click on the Accounts & Keys menu option, you will see the following screen −

Account and Keys

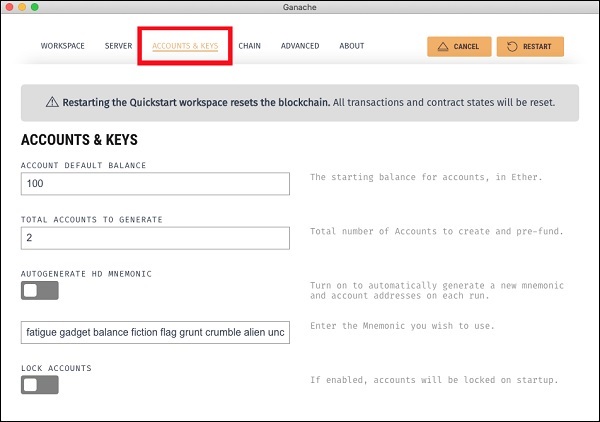
Here you would be able to set the default balance for each account. The default value is 100. This now explains why you saw 100 ETH displayed for each account in the Desktop screenshot. You can also set the number of accounts on this screen. The value displayed in this screenshot is 2 and that is why the desktop showed only two accounts.

Now, we will work out with the two settings’ screen; the knowledge of how these two work would suffice. Restart the server by clicking on the RESTART button in the right hand side of the screen. You will now return to the Desktop screen. Try inputting different values in the above two fields, restart the server and see its effect.

Similar Posts

  • Deploying the Contract

    In this chapter, we will learn how to deploy contract on Ethereum. Click on the Run menu option to deploy the contract. The following screen will appear. The contract name is shown in the highlighted list box. Below this, you will notice the Deploy button, click on it to deploy the contract. The contract will be deployed…

  • Introduction

    A huge success of Bitcoin raised interest in the minds of several to create their own currencies. Looking at the advantages offered by Bitcoin – a digital currency, people wanted to use the concept of Blockchain in their own applications. People wanted to move out of their physical contracts to smart digital contracts where several…

  • Ganache for Blockchain

    Ganache is used for setting up a personal Ethereum Blockchain for testing your Solidity contracts. It provides more features when compared to Remix. You will learn about the features when you work out with Ganache. Before you begin using Ganache, you must first download and install the Blockchain on your local machine. Downloading Ganache You…

  • Creating Contract Users

    In this chapter, we will learn the creation of contract users on Ethereum. To create a user for our published contract, we will create another MyEtherWallet client attached to the same Ganache Blockchain that you have been using in the previous steps. Go to the MyEtherWallet screen and create a new wallet. Click on the contracts menu and select the “Interact with…

  • MyEtherWallet

    For client application, you will use MyEtherWallet. Download MyEtherWallet software from the following URL − If required, unzip the downloaded file and open index.html. You will see the following interface for creating a new wallet.

  • Compiling the Contract

    Once you write the complete contract code, compiling it in this IDE is trivial. Simply click on the Autocompile checkbox in the IDE as shown in the screenshot below − Alternatively, you may compile the contract by clicking the button with the title “Start to compile”. If there is any typo, fix it in the code window. Make…