Attaching Wallet to Ganache Blockchain

You have now created a wallet; this wallet is a client interface to the Blockchain. We will attach the wallet to the Ganache Blockchain that you have started in the earlier lesson. To do so, click on the Network dropdown box as shown in the screenshot below −
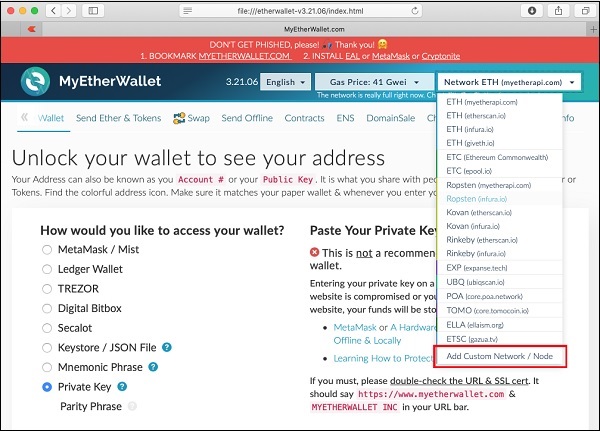
Network Dropdown

Go to the bottom of the list. You will see an option for “Add Custom Network / Node”. Select this item.

Now, a screen will appear asking for the Ganache server address and the port to which it is listening.
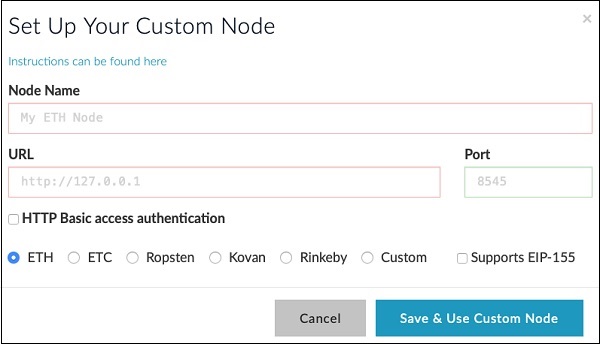
Add Custom Network

Type your Ganache server details – http://127.0.0.1 and Port: 8545. These would be the values set by you in the Ganache server setup. Give a name of your choice to this node. Click on the “Save & Use Custom Node” button. You will see the connected message at the bottom of the screen. At this point, your wallet is successfully connected to the Ganache Blockchain.

You are now ready to deploy the contract on this connected Blockchain.

Similar Posts

  • Creating Wallet

    In this chapter, we will learn how to create Ethereum wallet. To create a new wallet, enter a password of your choice and then click on the “Create New Wallet” button. When you do so, a Wallet would be created. A digital wallet is essentially the generation of a public/private key pair that you need…

  • Deploying the Contract

    In this chapter, we will learn how to deploy contract on Ethereum. Click on the Run menu option to deploy the contract. The following screen will appear. The contract name is shown in the highlighted list box. Below this, you will notice the Deploy button, click on it to deploy the contract. The contract will be deployed…

  • MyEtherWallet

    For client application, you will use MyEtherWallet. Download MyEtherWallet software from the following URL − If required, unzip the downloaded file and open index.html. You will see the following interface for creating a new wallet.

  • A Quick Walkthrough

    We will now briefly understand what is available on the Ganache desktop. On the Desktop, at the top we have several menu options out of which a few are of immediate relevance to us. The menu bar is highlighted in the screenshot below − Clicking on the TRANSACTIONS menu shows all the transactions performed so far. You…

  • Summary

    You learned how to write your own digital contract in Solidity. You developed and tested the contract interface in the Remix IDE. For further multi-user testing, you deployed this contract on Ganache Blockchain. On Ganache, you created two user accounts. The first account was used for publishing the contract. The second account was used for…