
Now, you are ready to interact with the contract that you have deployed. Go back to MyEtherWallet desktop and click on the “Interact with Contract” tab as shown in the screenshot below −
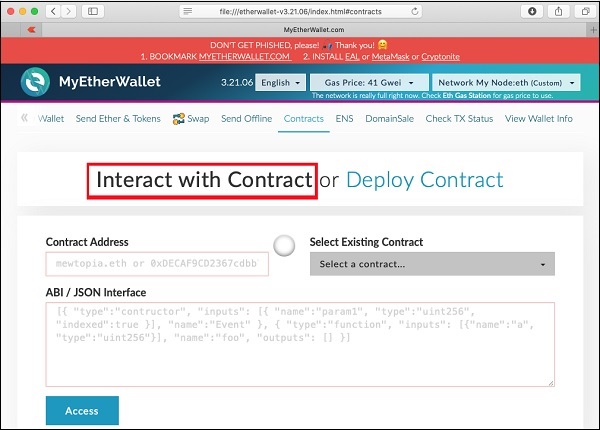
Paste the contract address that you previously copied in the “Contract Address” field. You also need to paste the “ABI / JSON Interface” of the contract on the above screen.
To get the ABI, go to the Remix window and click on the ABI button as shown in the screenshot below.
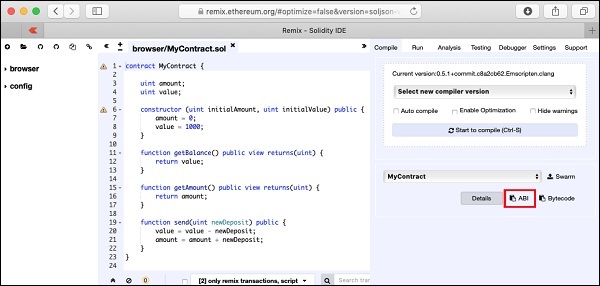
The ABI / JSON interface will be copied to the clipboard. Paste this in your favorite editor to examine the generated interface, which is shown below −ABI / JSON Interface [ { “constant”: false, “inputs”: [ { “name”: “newDeposit”, “type”: “uint256” } ], “name”: “send”, “outputs”: [], “payable”: false, “stateMutability”: “nonpayable”, “type”: “function” }, { “inputs”: [ { “name”: “initialAmount”, “type”: “uint256” }, { “name”: “initialValue”, “type”: “uint256” } ], “payable”: false, “stateMutability”: “nonpayable”, “type”: “constructor” }, { “constant”: true, “inputs”: [], “name”: “getAmount”, “outputs”: [ { “name”: “”, “type”: “uint256” } ], “payable”: false, “stateMutability”: “view”, “type”: “function” }, { “constant”: true, “inputs”: [], “name”: “getBalance”, “outputs”: [ { “name”: “”, “type”: “uint256” } ], “payable”: false, “stateMutability”: “view”, “type”: “function” } ]
After you paste this JSON in the MyEtherWallet interface, you will notice that the ACCESS button below the JSON interface is now activated, as shown below −
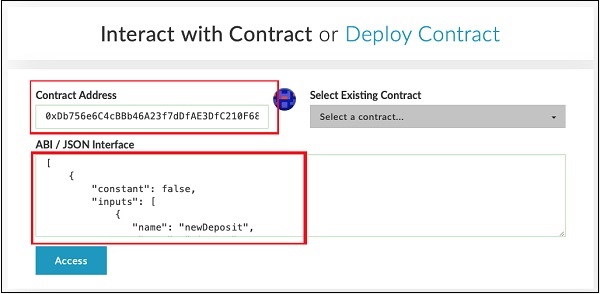
Click Access button to access the contract.
Upon clicking the Access button, the contract address and function selection dropdown will appear on the screen like in the Remix editor. This is shown in the screenshot below −
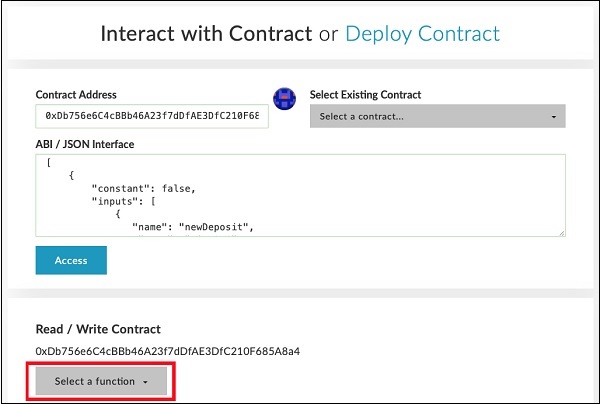
You may check the various functions of the contract as in the case of Remix deployment. Note that the contact is now deployed on an external Ganache Blockchain. Check the getAmount function; you will get the Amount value of zero and the getBalance will show a balance of 1000.
Now try sending some money. It will present you a textedit control for entering the amount. When you write the contract, some “gas” would be used and you will be asked to confirm the transaction before writing it to the Blockchain. The transaction would be executed in a short while depending on the mining timing set by you on the Ganache server. After this, you can reexamine the value and the amount fields of the contract to verify that these are indeed modified.
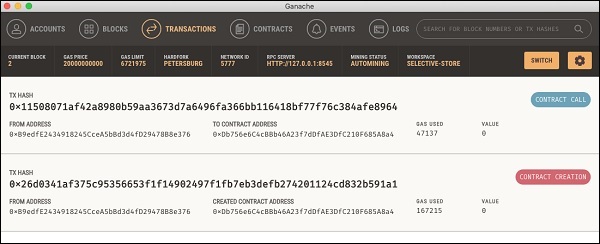
You may now examine the Ganache desktop to view the transactions that you have performed so far. A sample output is shown below −
So far, you were both the contract creator and the contract executor. This does not make much sense, as you expect others to use your contract. For this, we will create another client for our Ganache Blockchain and send some money from the newly created account # 2 to the contract creator at account # 1.