A Quick Walkthrough

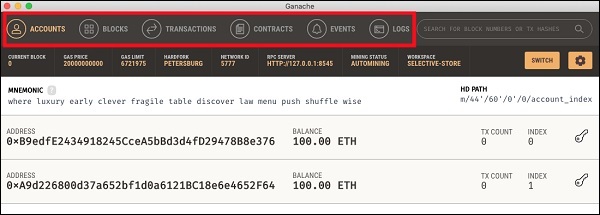
We will now briefly understand what is available on the Ganache desktop. On the Desktop, at the top we have several menu options out of which a few are of immediate relevance to us. The menu bar is highlighted in the screenshot below −

Ganache Menu Options

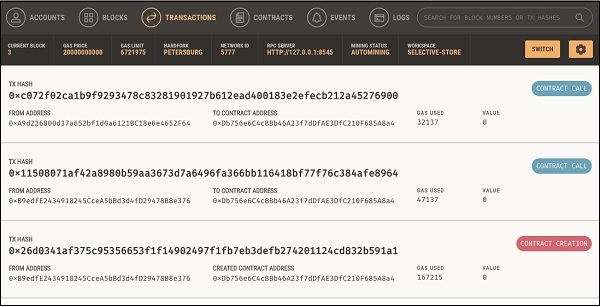
Clicking on the TRANSACTIONS menu shows all the transactions performed so far. You will be performing transactions very soon. Now, come back to the above screen and check the transactions from time to time. A typical transaction screen is as shown below −

Ganache TRANSACTIONS

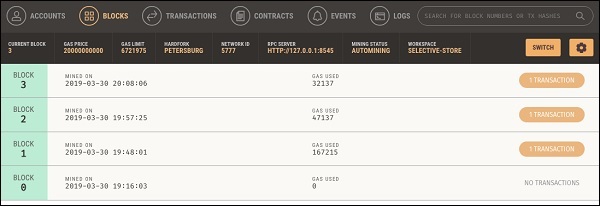
Likewise, when you click on the BLOCKS menu, you will see the various mined blocks. Consider the following screenshot to understand how the BLOCKS menu looks like −

Ganache Blocks

Click on the LOGS menu. It will open the system log for you. Here, you can examine the various operations that you have performed on the Ethereum Blockchain.

Now, as you have understood how to use Ganache for setting up a private Ethereum Blockchain, you will now create a few clients who would use this Blockchain.

Similar Posts

  • Ganache for Blockchain

    Ganache is used for setting up a personal Ethereum Blockchain for testing your Solidity contracts. It provides more features when compared to Remix. You will learn about the features when you work out with Ganache. Before you begin using Ganache, you must first download and install the Blockchain on your local machine. Downloading Ganache You…

  • Summary

    You learned how to write your own digital contract in Solidity. You developed and tested the contract interface in the Remix IDE. For further multi-user testing, you deployed this contract on Ganache Blockchain. On Ganache, you created two user accounts. The first account was used for publishing the contract. The second account was used for…

  • Solidity for Contract Writing

    Solidity is an object-oriented language especially developed for contract writing. It is a high-level language, which inherits traits from C++, Python, and JavaScript. The Solidity compiler compiles your source code into bytecode that runs on Ethereum Virtual Machine (EVM). For quick understanding of the Solidity syntax, look at the sample code in the IDE.pragma solidity…

  • Limitations of Remix

    The Remix IDE that you have used so far is good enough for development and initial testing of your contract. For real-life contracts, you need to test your functionality against various parameters. Remix cannot create real (non-test) user accounts to transfer funds between them. You have no control over the configuration of the Blockchain created…

  • Creating Contract Users

    In this chapter, we will learn the creation of contract users on Ethereum. To create a user for our published contract, we will create another MyEtherWallet client attached to the same Ganache Blockchain that you have been using in the previous steps. Go to the MyEtherWallet screen and create a new wallet. Click on the contracts menu and select the “Interact with…