Smart Contracts

There are several tools available to develop and test contracts. One of the simplest tools is provided on the official Ethereum site itself. The tool is called Remix, we will use this for our contract development.

Remix for Contract Development

Open the Remix IDE by typing in the following URL in your browser.https://remix.ethereum.org

The following screen will appear.

Contract Development

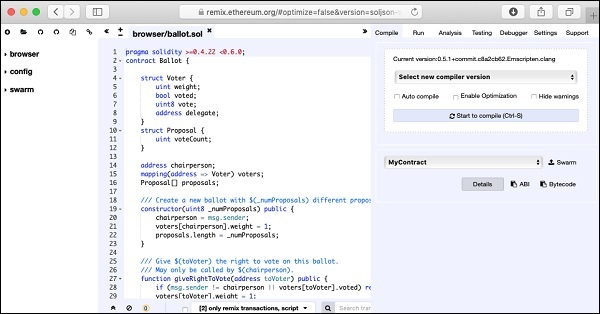
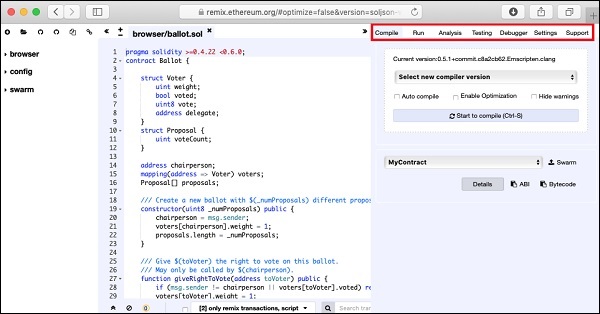
In the center window, you will see some default code, which is a sample Solidity code. You will type your contract code in this code editor. Your code may be auto-compiled. Upon successful compilation of the code, you will be able to run the code in the same IDE. When you execute the contract methods, the results will be displayed in the same IDE window. There are facilities to debug the code and to unit test your project. These can be seen in the menu bar at the top right hand side as shown in the IDE screenshot below. You will be using these options shortly.

Remix options

You will now start writing your contract.

Similar Posts

  • Limitations of Remix

    The Remix IDE that you have used so far is good enough for development and initial testing of your contract. For real-life contracts, you need to test your functionality against various parameters. Remix cannot create real (non-test) user accounts to transfer funds between them. You have no control over the configuration of the Blockchain created…

  • Introduction

    A huge success of Bitcoin raised interest in the minds of several to create their own currencies. Looking at the advantages offered by Bitcoin – a digital currency, people wanted to use the concept of Blockchain in their own applications. People wanted to move out of their physical contracts to smart digital contracts where several…

  • Deploying the Contract

    In this chapter, we will learn how to deploy contract on Ethereum. Click on the Run menu option to deploy the contract. The following screen will appear. The contract name is shown in the highlighted list box. Below this, you will notice the Deploy button, click on it to deploy the contract. The contract will be deployed…

  • Creating Contract Users

    In this chapter, we will learn the creation of contract users on Ethereum. To create a user for our published contract, we will create another MyEtherWallet client attached to the same Ganache Blockchain that you have been using in the previous steps. Go to the MyEtherWallet screen and create a new wallet. Click on the contracts menu and select the “Interact with…

  • A Quick Walkthrough

    We will now briefly understand what is available on the Ganache desktop. On the Desktop, at the top we have several menu options out of which a few are of immediate relevance to us. The menu bar is highlighted in the screenshot below − Clicking on the TRANSACTIONS menu shows all the transactions performed so far. You…

  • Deploying Contract

    To deploy the contract, select the Contracts menu option as shown in the screenshot below − You will need to enter the contract’s bytecode on this screen. Remember, when you compile your Solidity contract code, it generated a bytecode that runs on EVM. You will now need to obtain this bytecode from Remix IDE. Go to the Remix…